Connect the Prodoscore MCP to your AI tool using the instructions below.
Jump to:
Claude
OAuth Redirect URIs
When configuring the connector in the Anthropic Console, ensure the following redirect URIs are whitelisted for the Prodoscore application:
- https://claude.ai/api/mcp/auth_callback
- https://claude.com/api/mcp/auth_callback
Step 1: Initiate the Connection
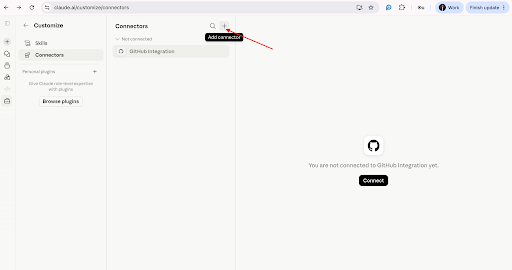
- Navigate to https://claude.ai/customize/connectors and select the (+) icon to add a new connector.
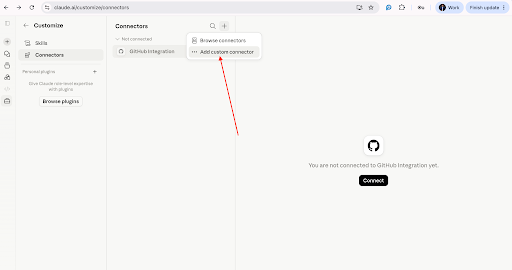
- From the available options, choose “Add custom connector.”
Step 2: Configure the Connector
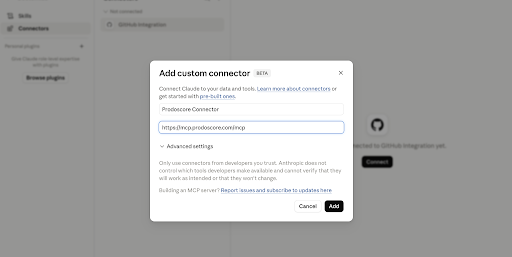
- Enter a descriptive name for the connector and provide the Prodoscore MCP URL (https://mcp.prodoscore.com/mcp).
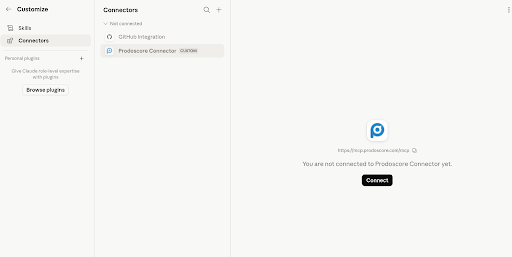
- Once added, the connector will appear in your integrations list.
Step 3: Authenticate with Prodoscore
- Click Connect to start the authentication process. You will be redirected to the Prodoscore MCP login page, where you can authenticate using your existing SSO (Single Sign-On) credentials.
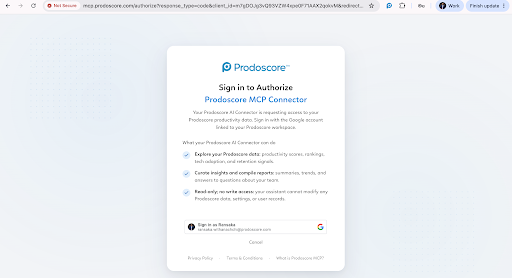
- After successful authentication, you will be redirected back to the Claude connectors page, where a confirmation message will appear indicating successful setup.
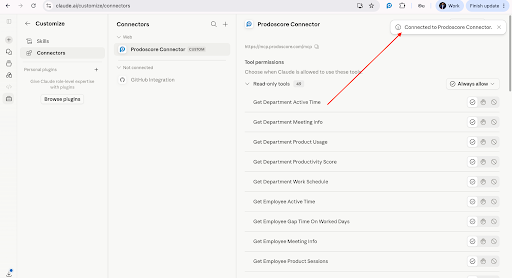
Step 4: Start Using the Connector
- Once setup is complete, you can begin accessing and analyzing Prodoscore productivity insights directly within Claude.
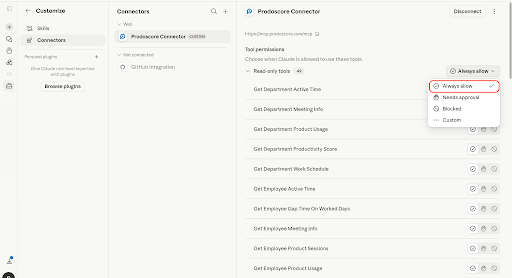
Pro Tip: For a smoother experience, set tool permissions to “Always allow”, enabling Claude to automatically execute Prodoscore tools without repeated confirmations.
Copilot
Step 1: Generate Client Credentials
- Head over to the Prodoscore app and navigate to Settings -> Products -> Prodoscore MCP.
- Select the Client Credentials tab.
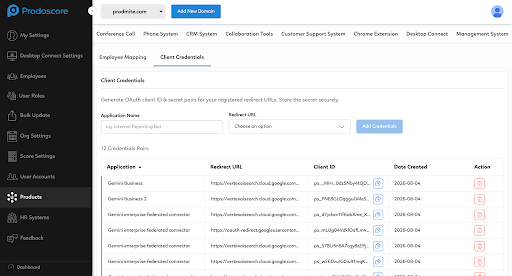
- Give your application credentials a name and provide the following Redirect URL: https://teams.microsoft.com/api/platform/v1.0/oAuthRedirect
- Copy the Client ID and Client Secret.
Note: The Client Secret only shows once; ensure you store it securely.
Take note of the Server Endpoints provided in the popup.
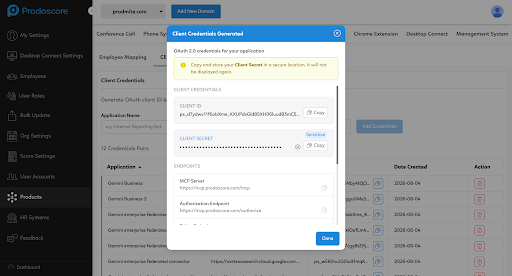
Step 2: OAuth Client Registration
- Go to the Microsoft Teams Developer Portal and select Tools -> OAuth client registration.
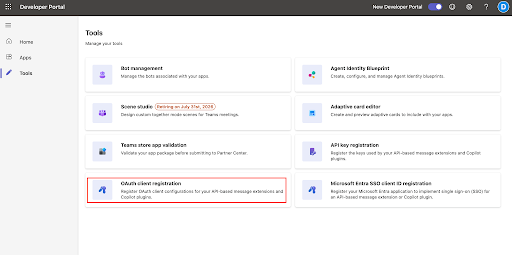
- Give your auth client a name and paste the server info from the previously noted Prodoscore credentials.
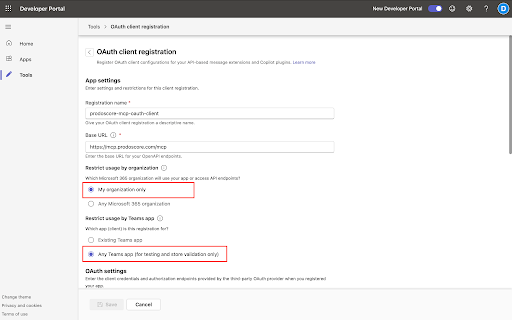
- Enter the Client ID and Client Secret.
- In the Scopes section, add mcp.
- Toggle on Enable Proof Key for Code Exchange (PKCE).
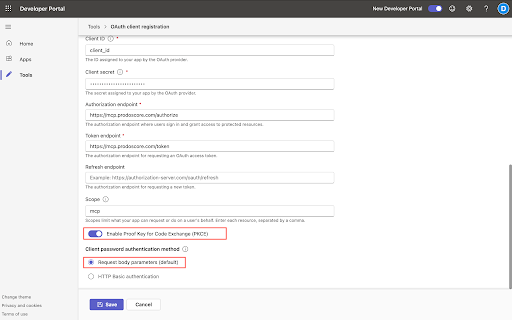
- Keep the remaining settings at their default values and click Save.
- Once saved, note the generated OAuth client registration ID.
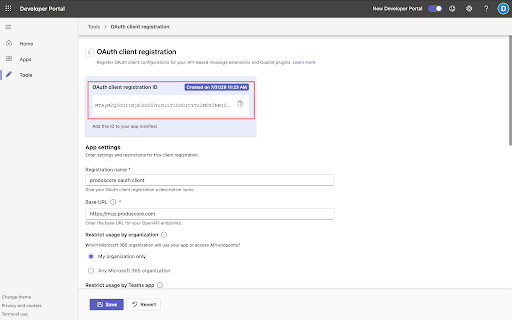
Step 3: Connect to MCP Server
- Navigate to the Microsoft 365 Admin Center via this link.
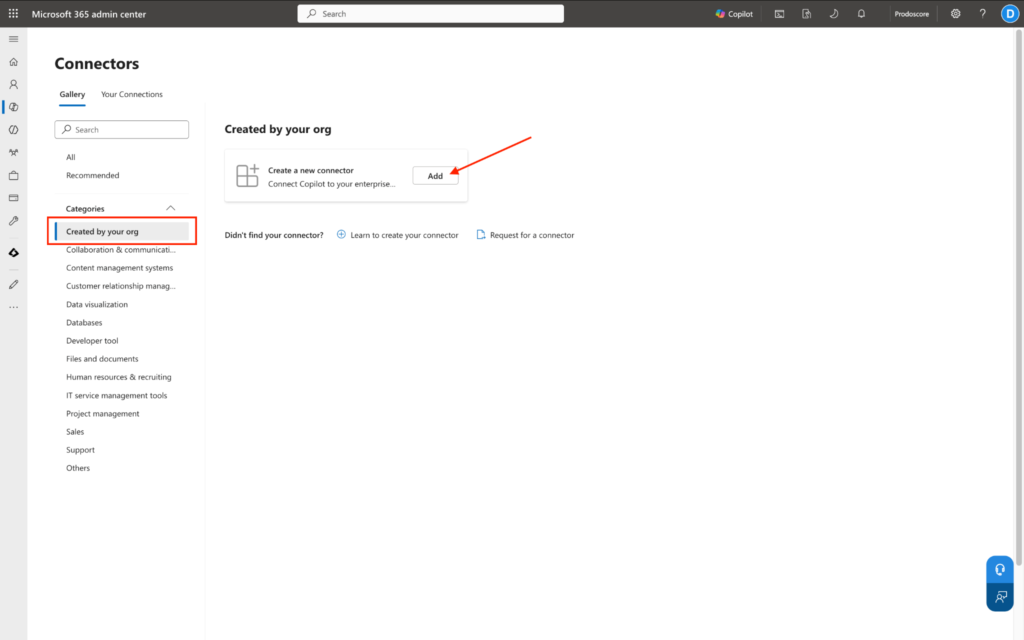
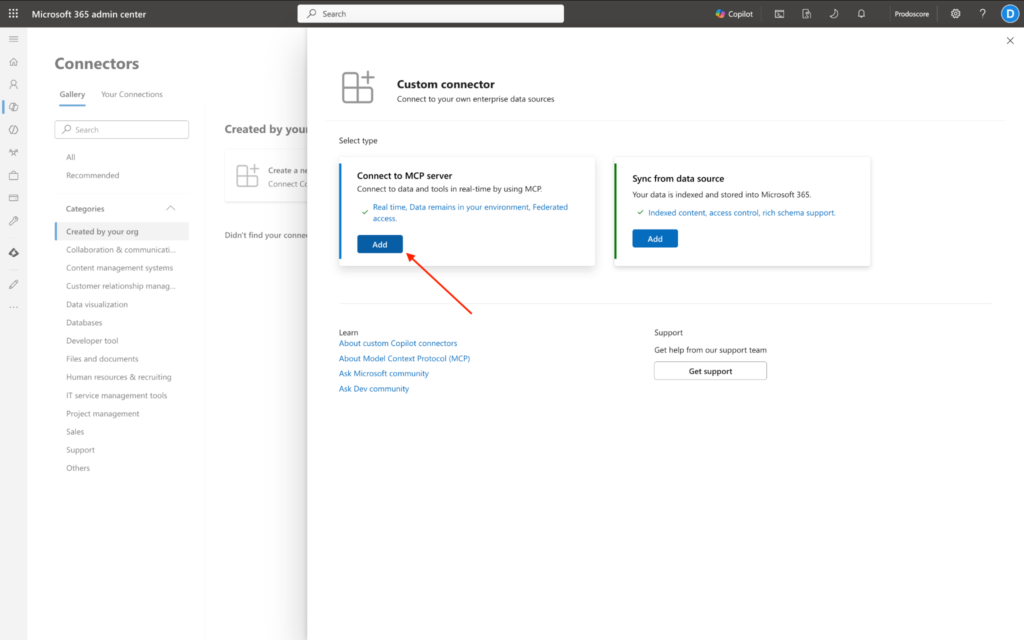
- Select Created by your org -> Add -> Connect to MCP server.
- Provide a name and fill in the Prodoscore MCP endpoint URL.
- Select OAuth 2.0 as the Authentication type.
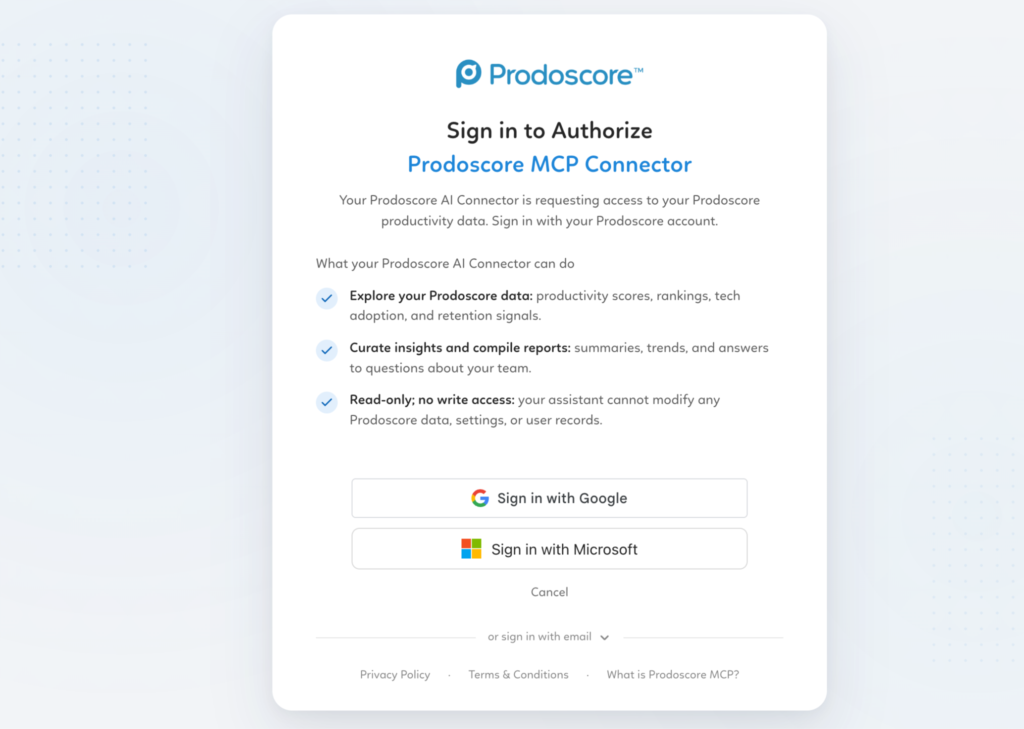
- In the Reference ID section, paste your OAuth client registration ID created in step 2 and click Authorize.
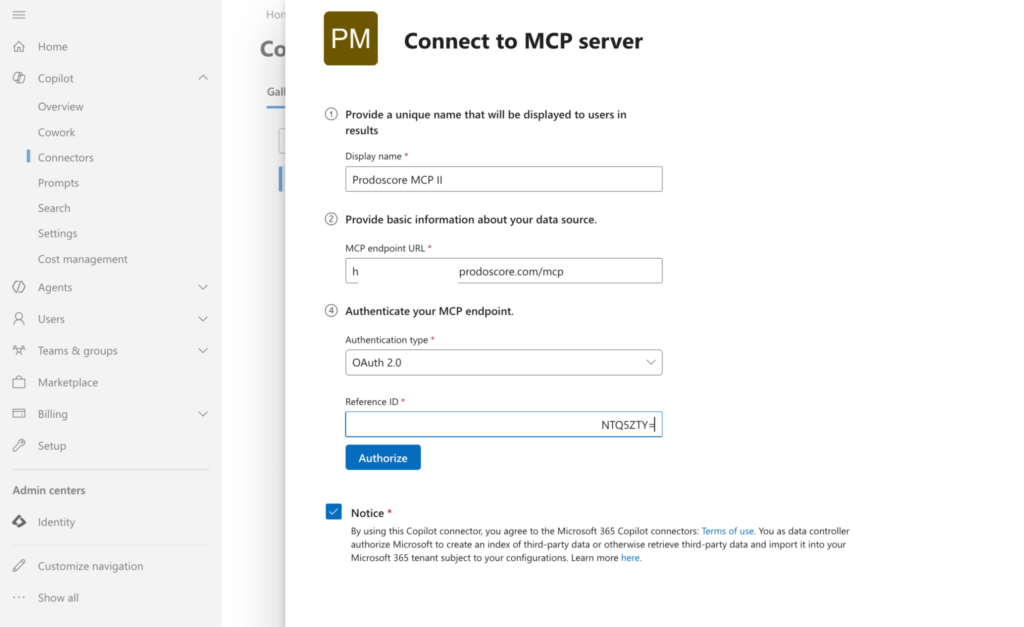
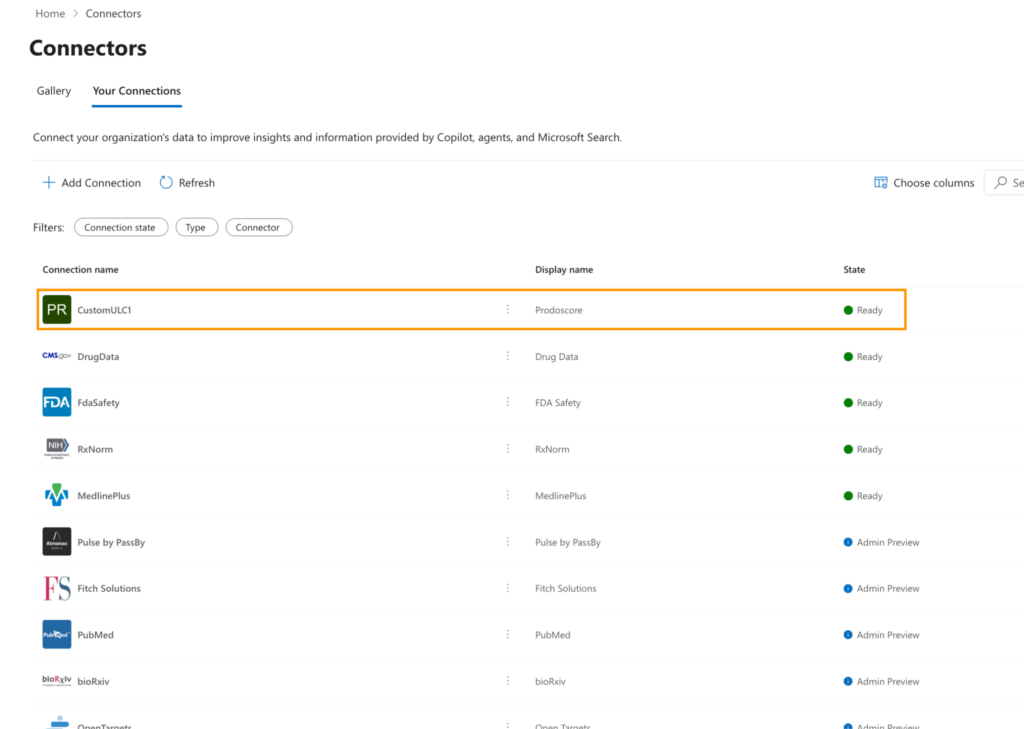
- Complete the authentication flow and verify the connector appears on the Connectors page.
- After successfully adding a connector, verify its presence on the Connectors page.
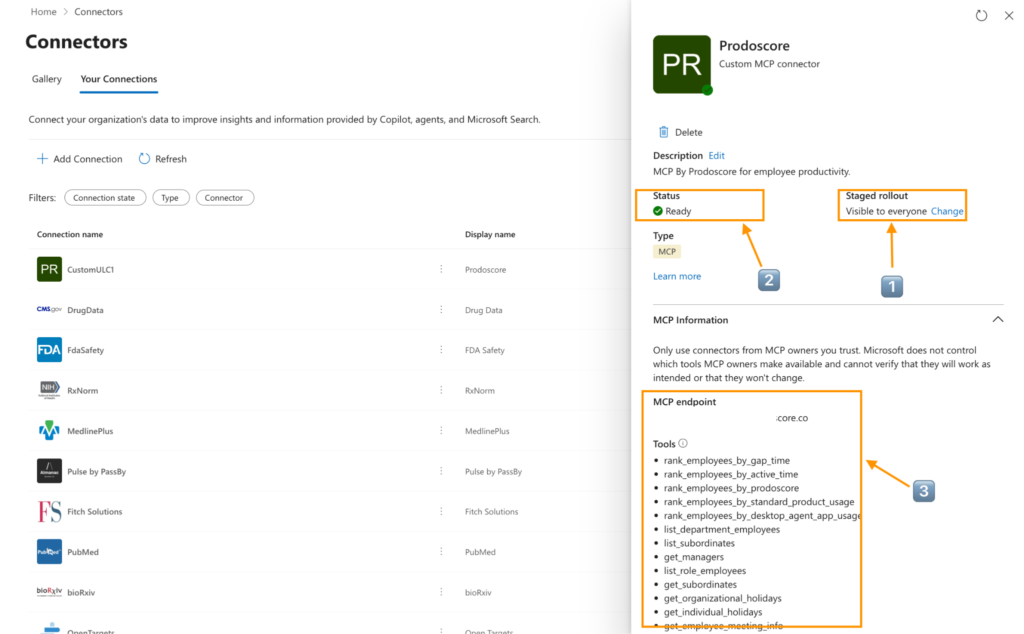
- Ensure the Status is active and Visibility is set to the correct audience.
- Note: These changes may take roughly 5 to 10 minutes to propagate throughout Microsoft systems.
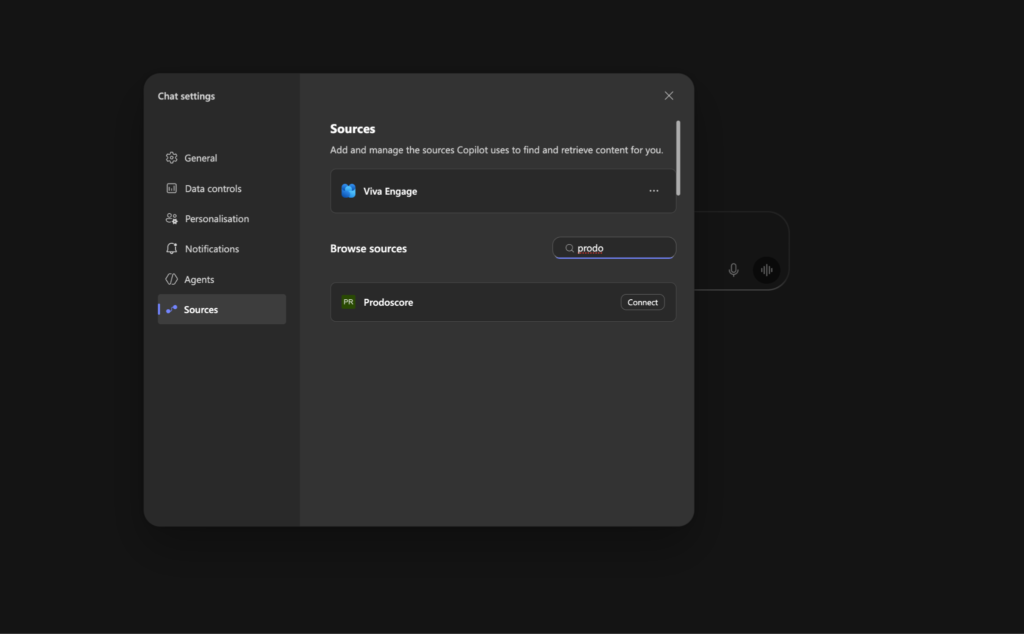
Step 4: Enable in Copilot Chat
- Head over to Microsoft 365 Chat.
- Click the three dots (ellipsis) in the top right to open Settings.
- Go to Sources and search for Prodoscore.
- Click Connect to finalize the integration.
Gemini
Step 1: Generate Client Credentials
- Navigate to the Prodoscore MCP in Product Settings.
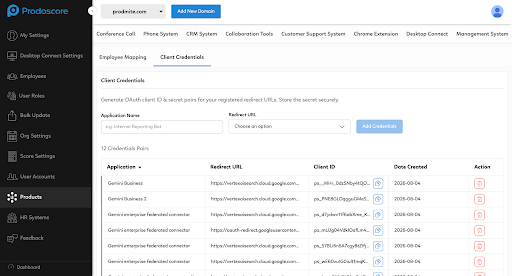
- Generate a new Client ID and Client Secret within the settings.
- Register Client: In the UI, provide a descriptive name for the chat client.
- Configure Redirect: Identify the callback URL of your specific chat client and enter it as the Allowed Redirect URL.
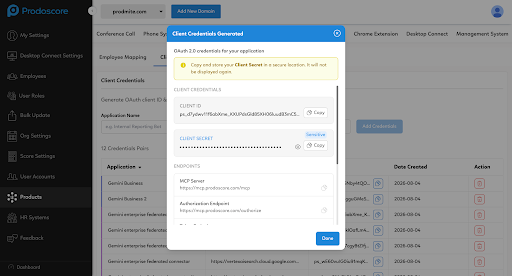
- Retrieve Credentials: Upon submission, Prodoscore will provision a unique Client ID and Client Secret pair specifically for that chat client.
- Securely store the Client Secret, as it will only be displayed once during the generation process.
Step 2: Configure Data Store in Gemini Enterprise
- Access the Gemini Enterprise console at: https://console.cloud.google.com/gemini-enterprise.
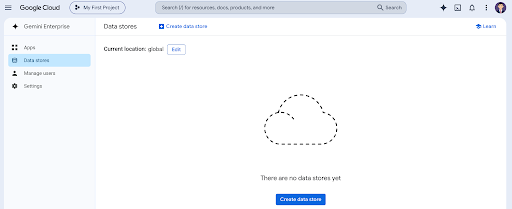
- Click on "Create Data Store" and select "OAuth 2.0" as the authentication method.
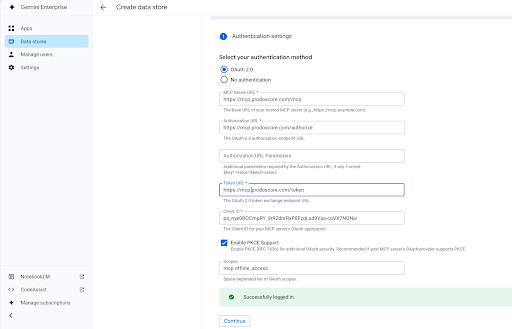
- Enter the appropriate server configurations and the credentials generated in Step 1.
- Important: In the Scopes section, enter "mcp offline_access" (space separated). This is required for Gemini to successfully connect to MCP tools.
- Click "Verify Auth" and complete the Prodoscore login flow.
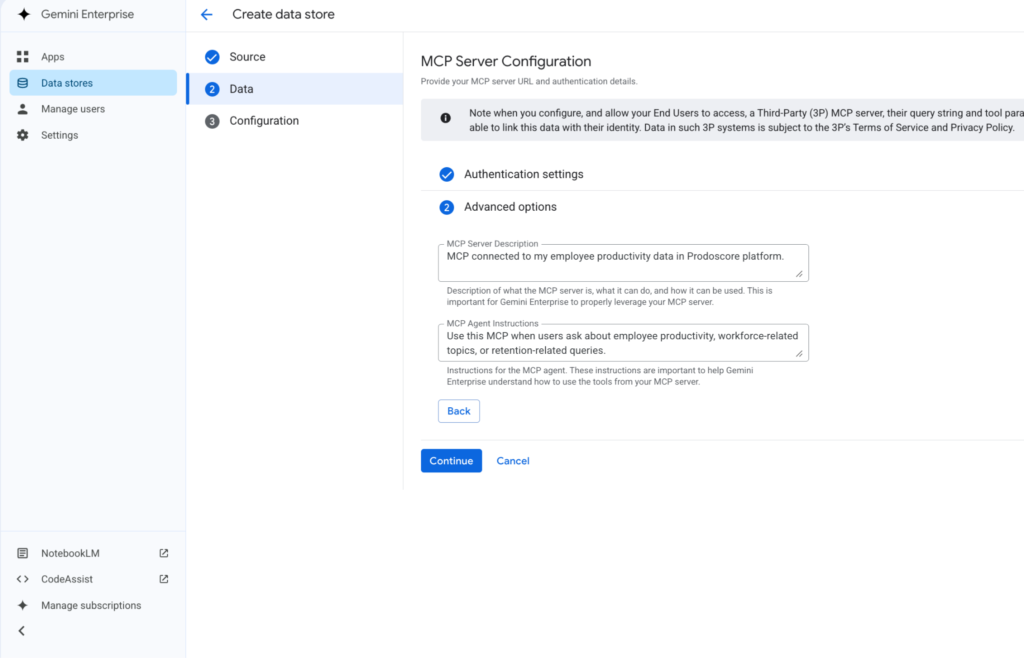
- Add a descriptive MCP server description and agent instructions to improve tool discovery for end-users.
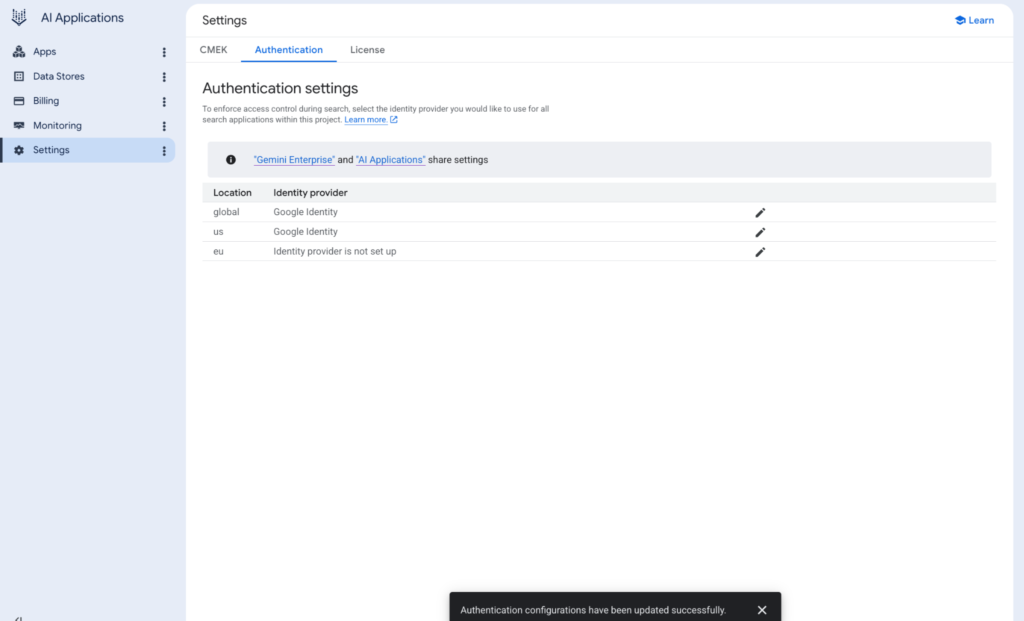
- Select a data store location compliant with your domain's privacy policy and set the Authentication to Google Identity via the settings page.
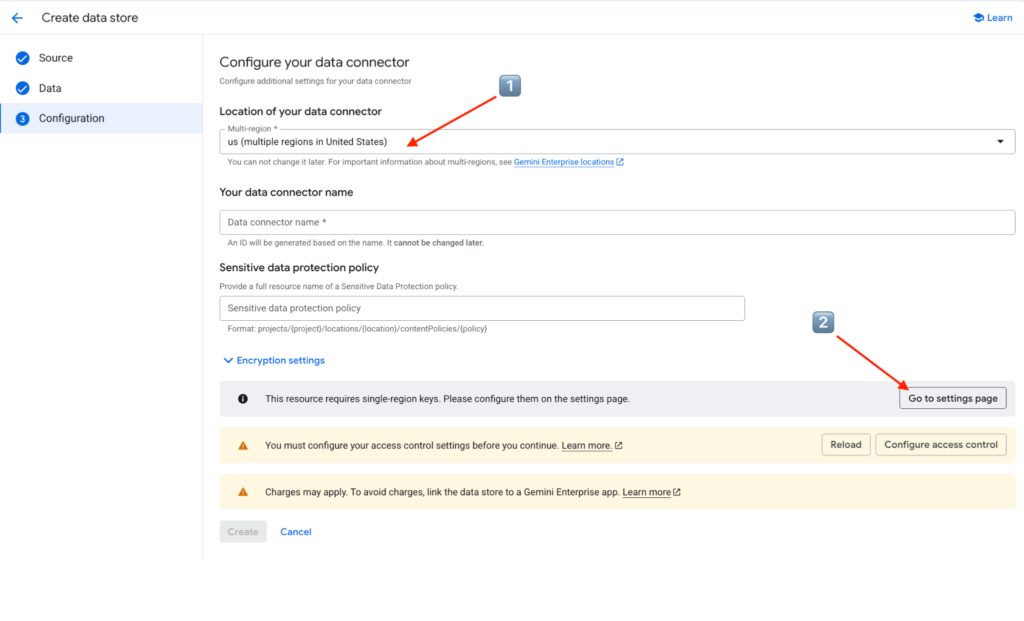
- Provide a unique name for your connector and click "Create" to finalize the data store setup.
- Note: These changes may take roughly 5 to 10 minutes to propagate throughout Google systems.
Step 3: Enable Actions and Tools
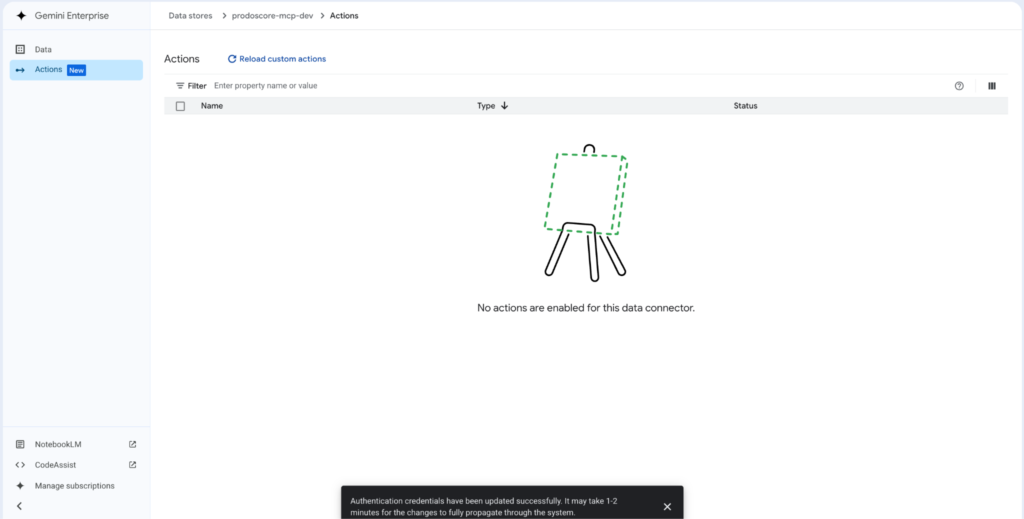
- Navigate to the Data Store Actions tab.
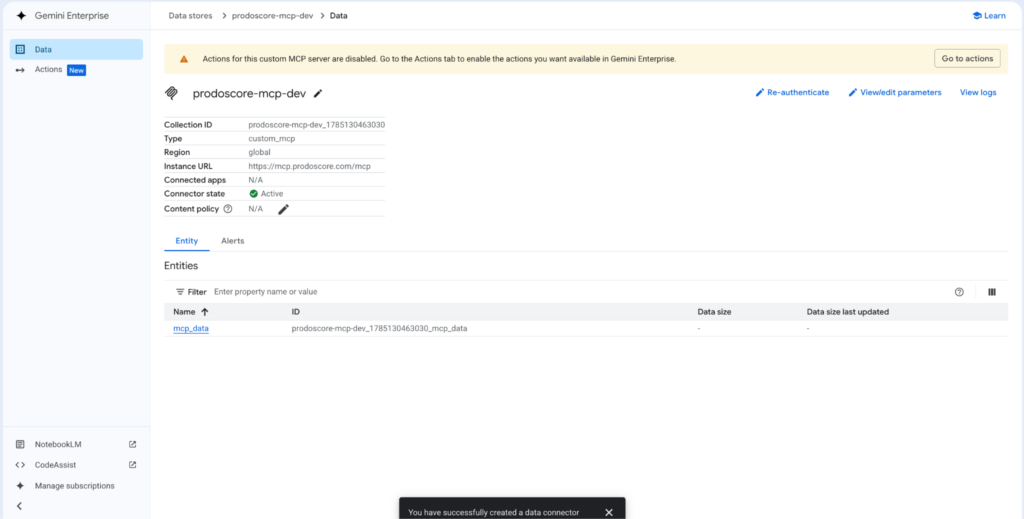
- Click on "Reload custom actions" and re-authenticate with your Prodoscore MCP credentials when prompted.
- If the custom action fails to load, wait a few minutes for the changes to propagate across Google systems.
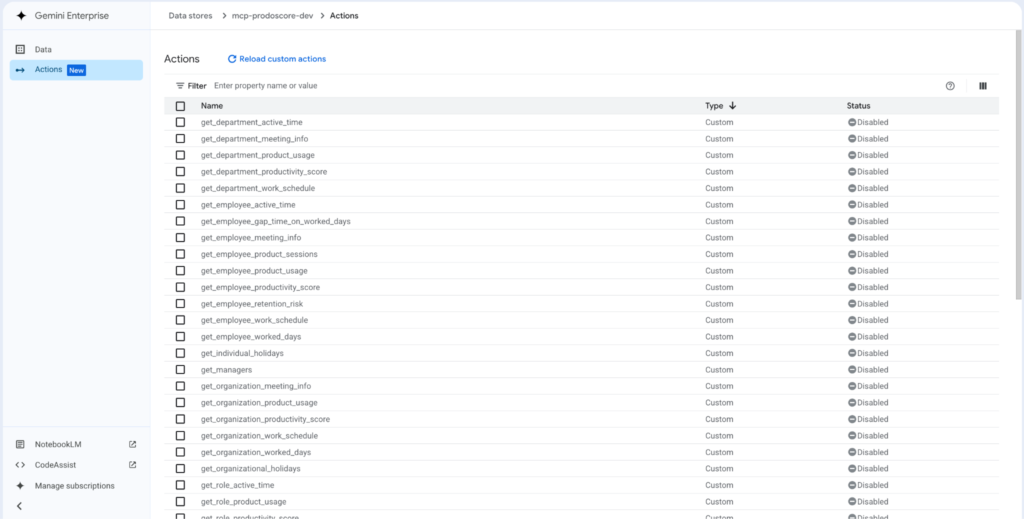
- Review the available tools and enable the required MCP tools for your integration.
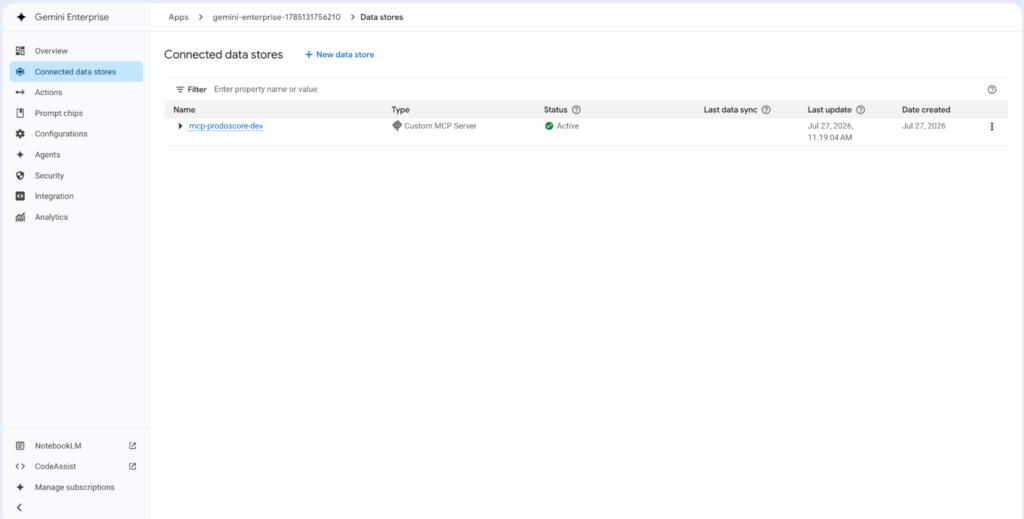
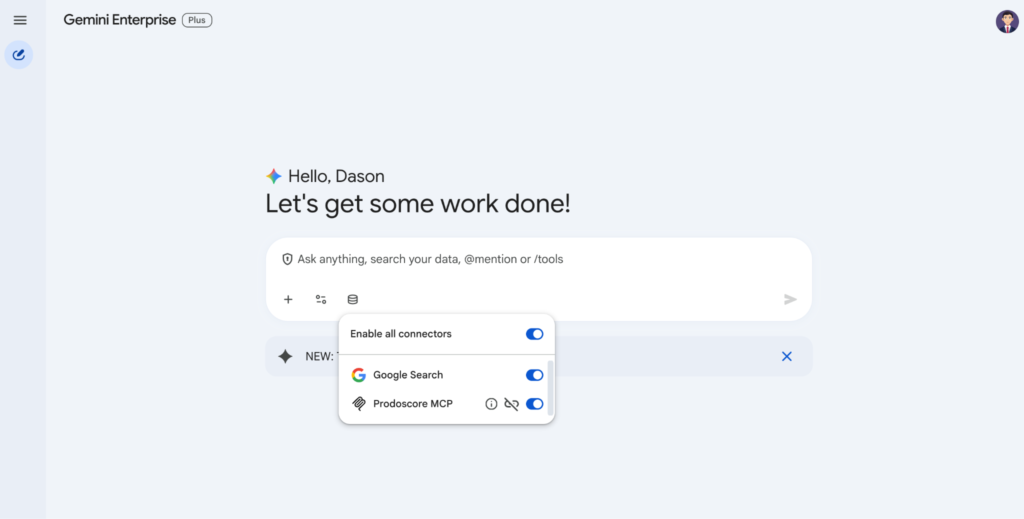
- Once completed, you can create a Gemini Enterprise application and attach the newly created Prodoscore MCP connector.
ChatGPT
Technical Specifications
The following parameters are required to configure the Prodoscore MCP as an OAuth 2.0 application within ChatGPT.
- Issuer (Base URL): https://mcp.prodoscore.com
- MCP Endpoint URL: https://mcp.prodoscore.com/mcp
- Authorization Endpoint: https://mcp.prodoscore.com/authorize
Prerequisites
Before beginning the setup, ensure you have the following:
- An active Prodoscore account with appropriate permissions (Team or Organization access).
- A ChatGPT Plus, Team, or Enterprise subscription.
- Developer Mode must be enabled in your ChatGPT account settings to add custom manifest-based plugins or connectors.
Setup Instructions (Personal ChatGPT Accounts)
Step 1: Enable Developer Mode
- Log in to your ChatGPT account.
- Navigate to Settings > Security and log in.
- Ensure that Plugins or Developer Mode is toggled ON.
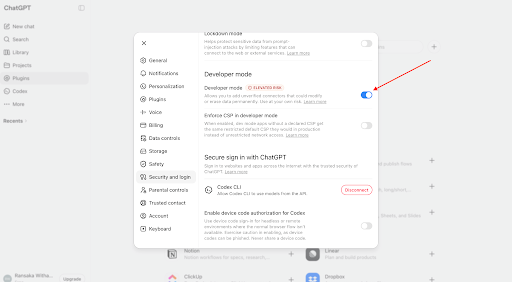
Step 2: Register the Prodoscore Connector
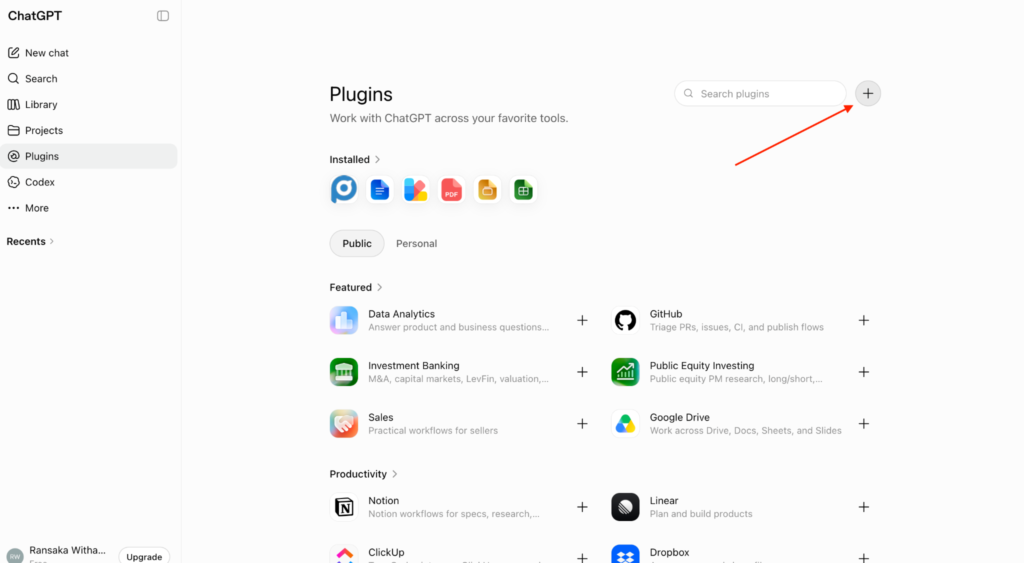
- Go to Settings > Plugins and click the plus icon to set up a new plugin.
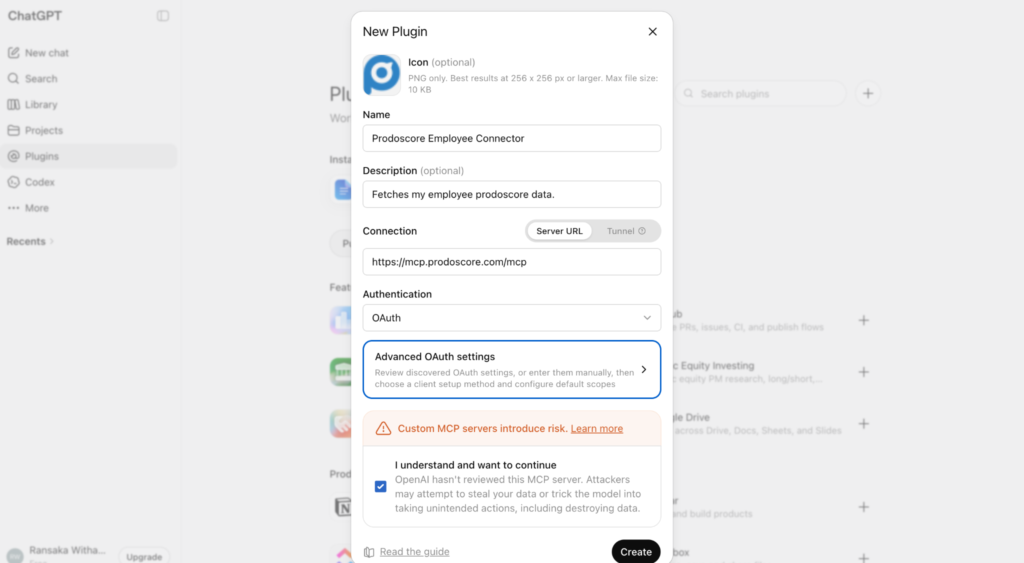
- Assign a descriptive name and details to the MCP connector, and configure the MCP URL as https://mcp.prodoscore.com/mcp. Click OAuth as the authentication mechanism.
Step 3: Authentication & Authorization
- Once the connector is added, click Create.
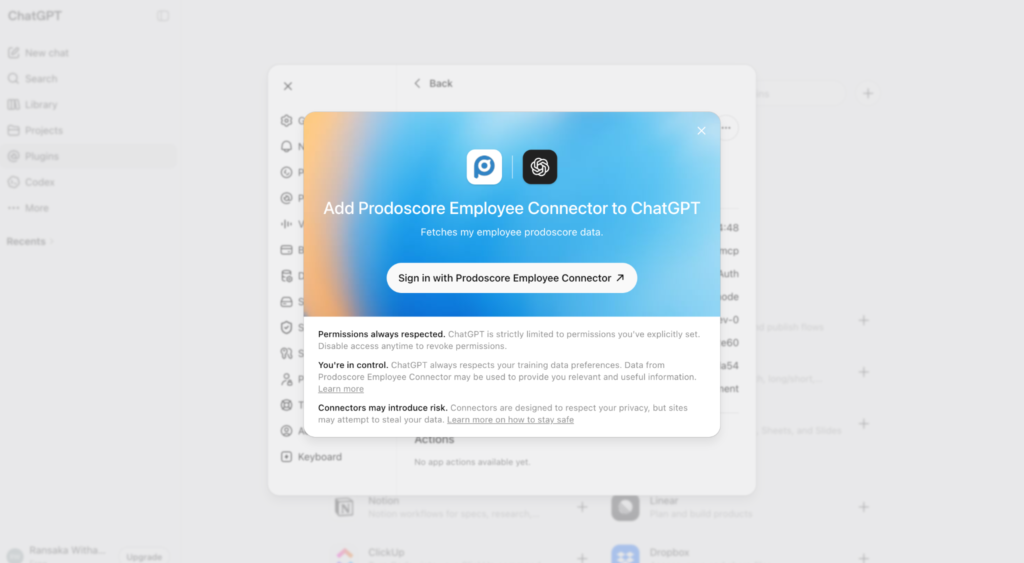
- You will be redirected to the Prodoscore Identity Provider.
- Sign in using your existing Prodoscore credentials (Google or Microsoft SSO support is enforced based on your domain configuration).
- After successful login, you will be redirected back to ChatGPT.
Quick Tip!
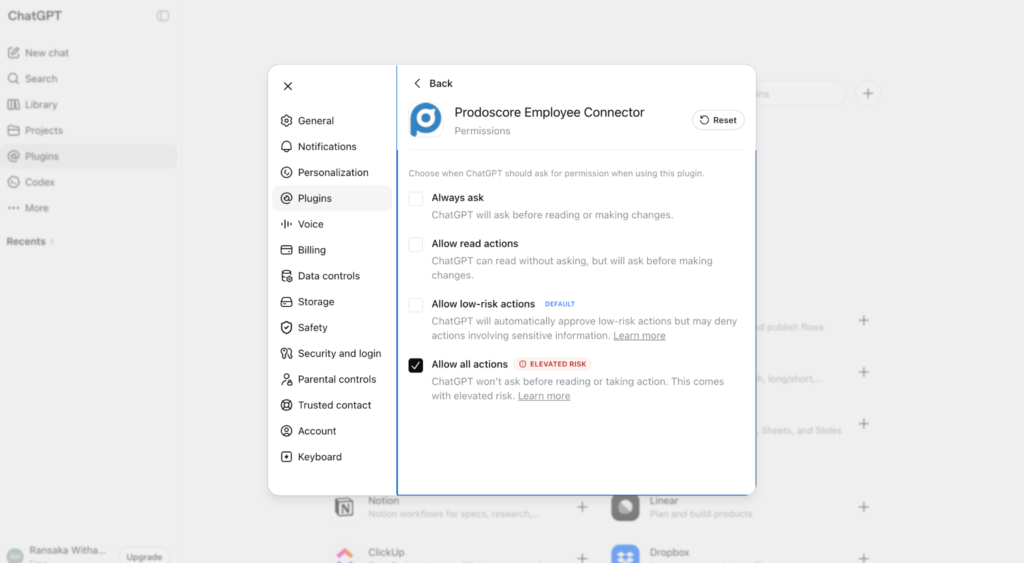
To ensure the best experience with Prodoscore tools, navigate to the Prodoscore plugin permissions section and check the Allow all actions option.
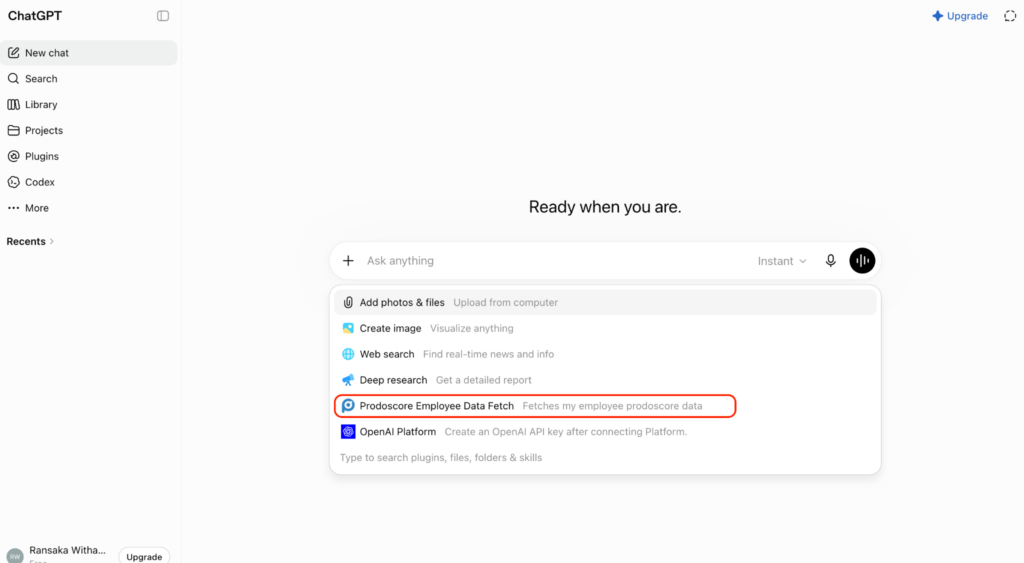
You can now manually trigger the Prodoscore connector through the chat interface, or allow it to activate automatically depending on the relevance of your query.
Setup Instructions (Business ChatGPT Accounts)
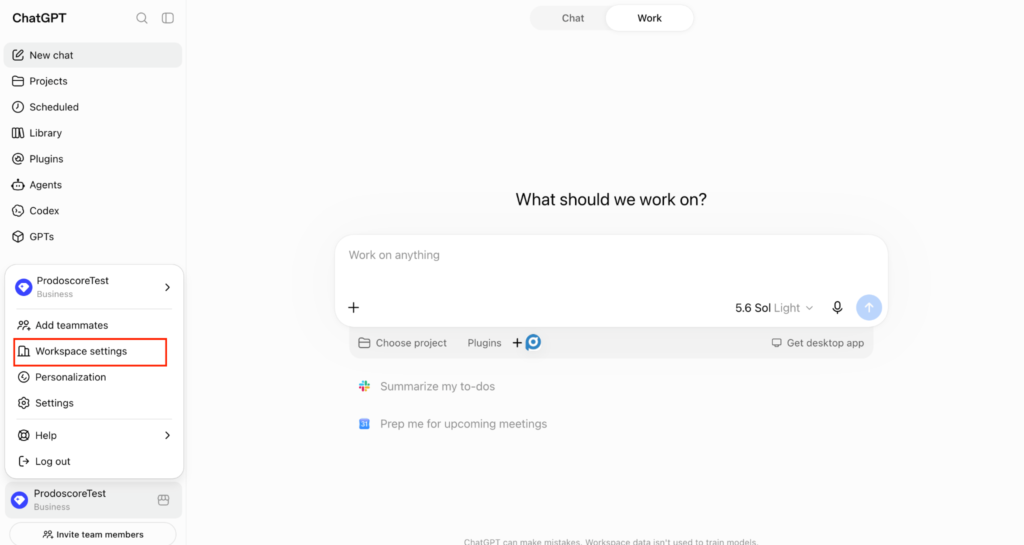
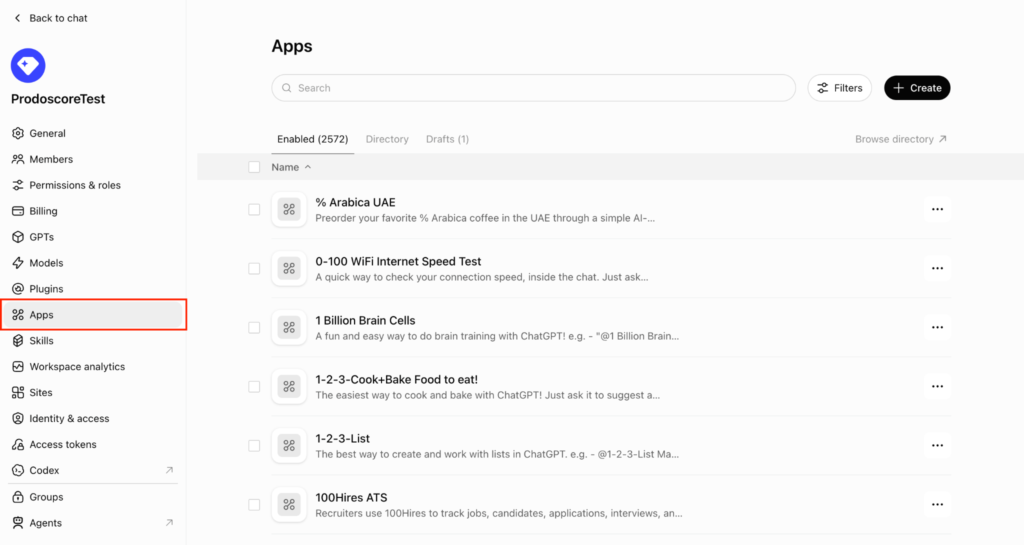
- Navigate to chatgpt.com, then proceed to Workspace Settings and select Apps.
- Select the create option and complete all the required information fields.
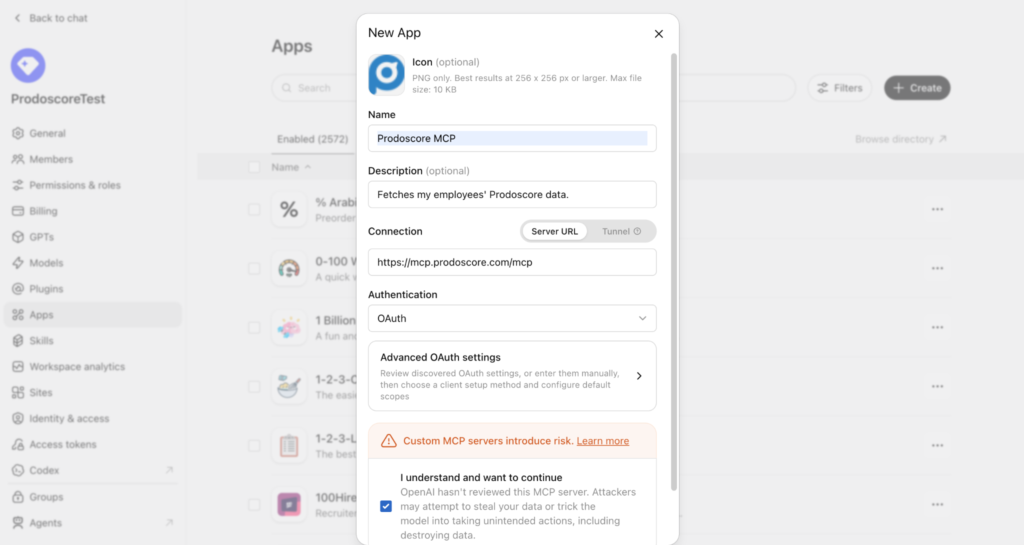
- The app will be listed as a Draft app in the Apps section after you select create.
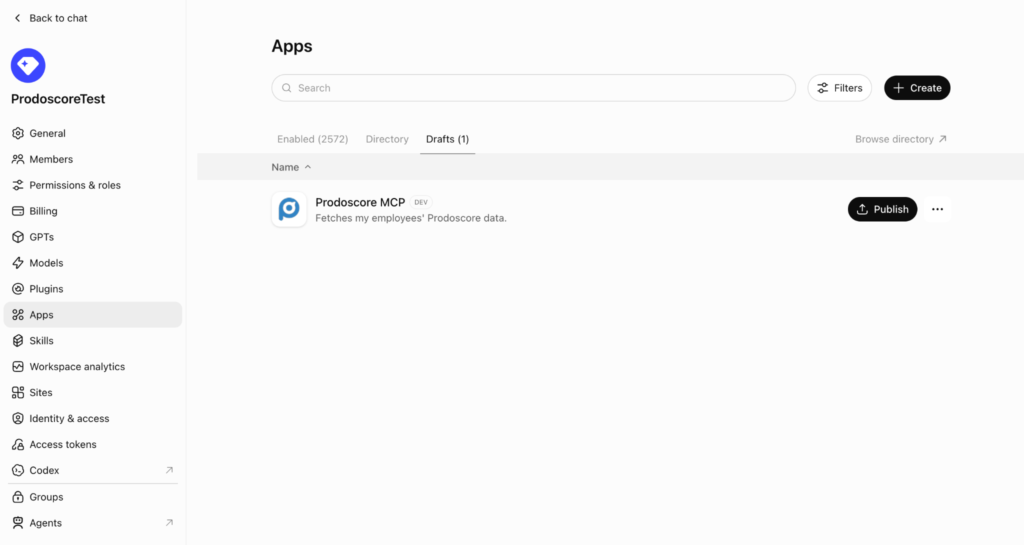
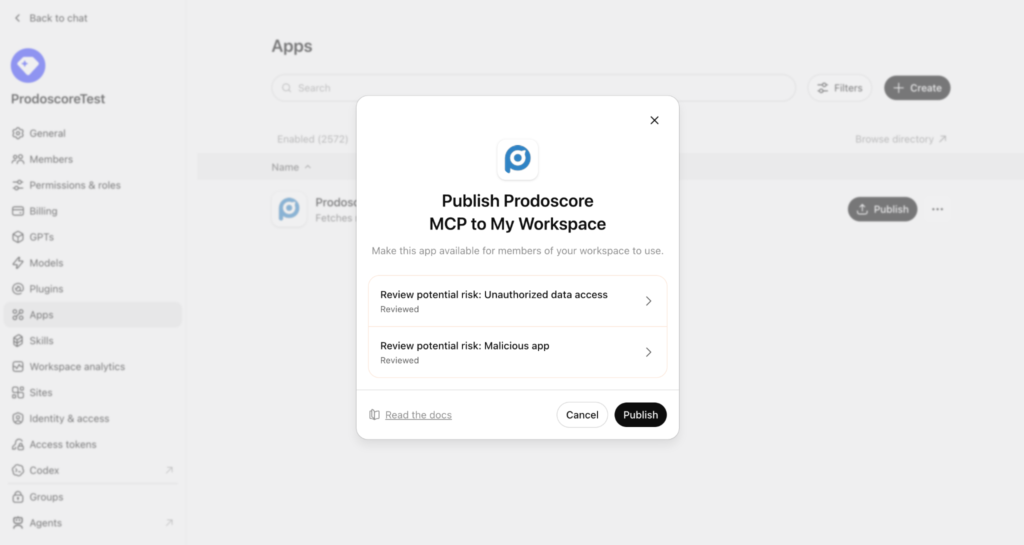
- Select publish, then review and accept the security terms provided by OpenAI.
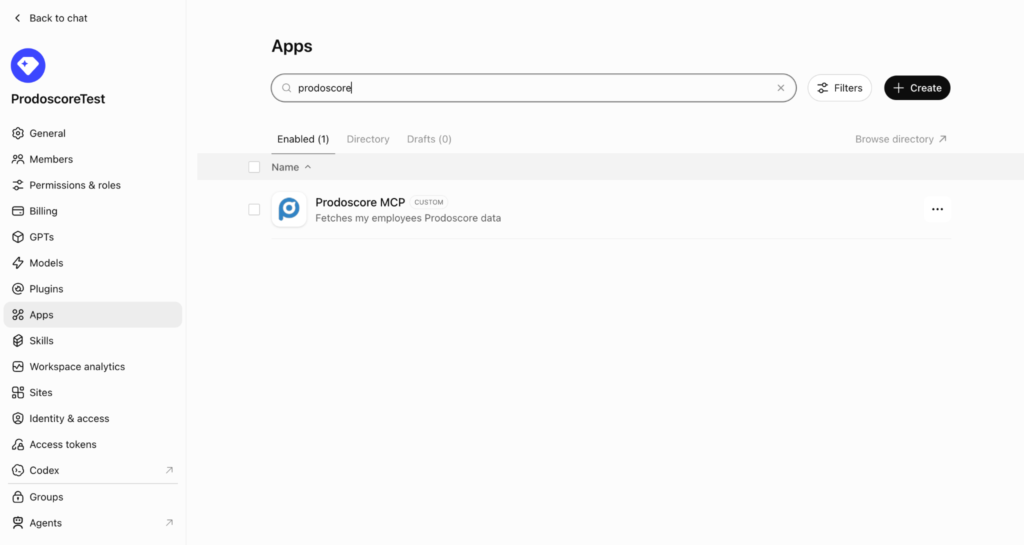
- Verify that the application is displayed under the enabled applications section.
Authentication & Authorization (Business ChatGPT Accounts)
- After the workspace administrator enables the applications by following the "5. Setup Instructions" section above, workspace users will be able to view the created application within the organization’s workspace.
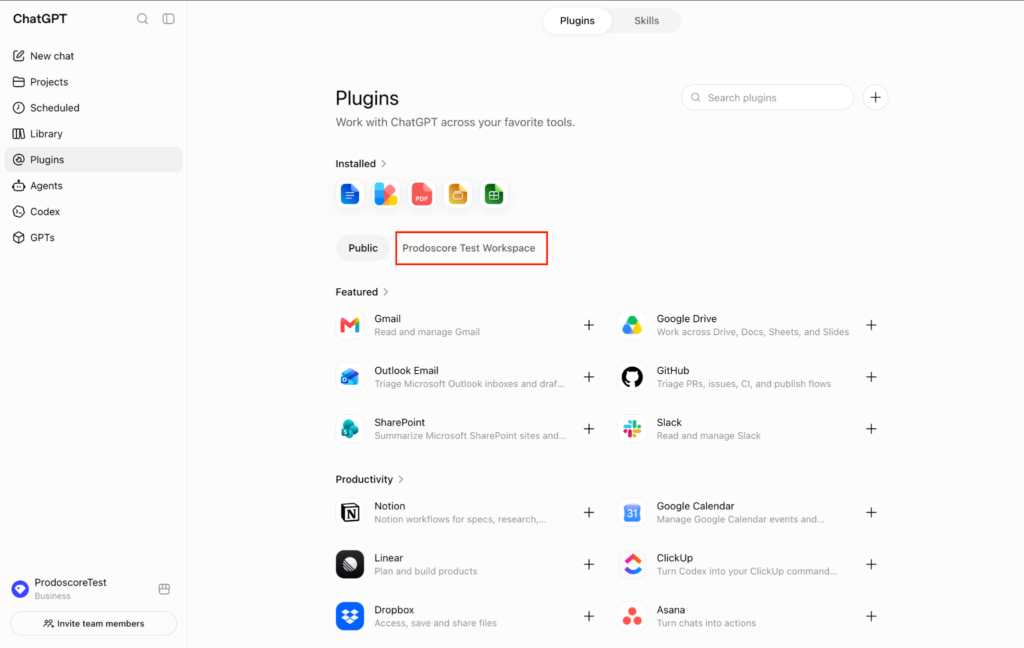
- To view the application, proceed by navigating to the Plugins section.
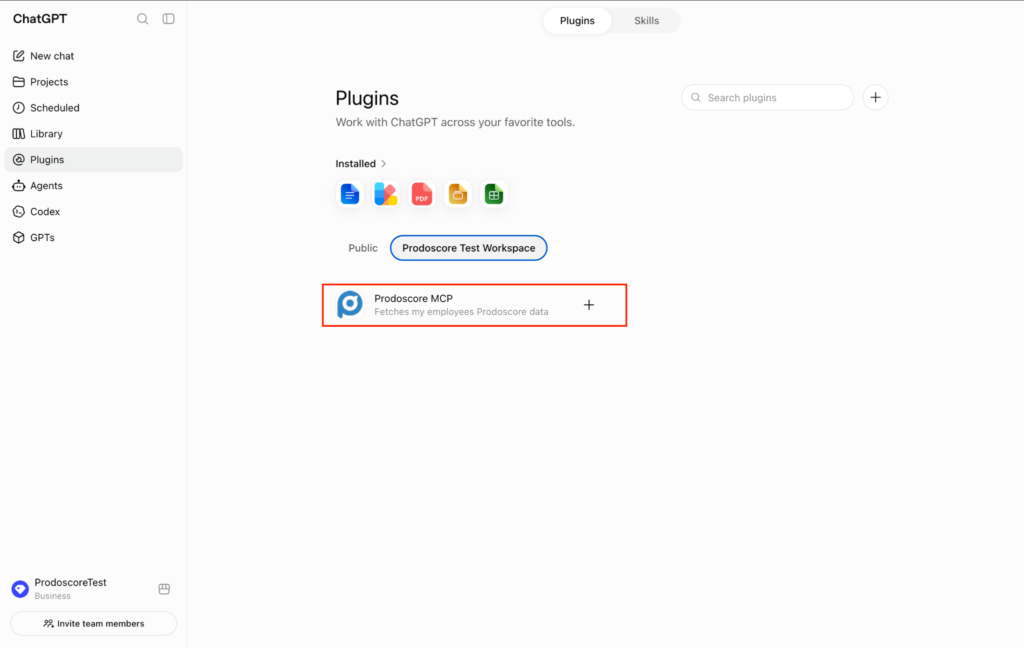
- To initiate the authentication process, click the plus icon to add the MCP server to your chat. Following successful authentication, the available plugin will be displayed beneath the chat bubble.
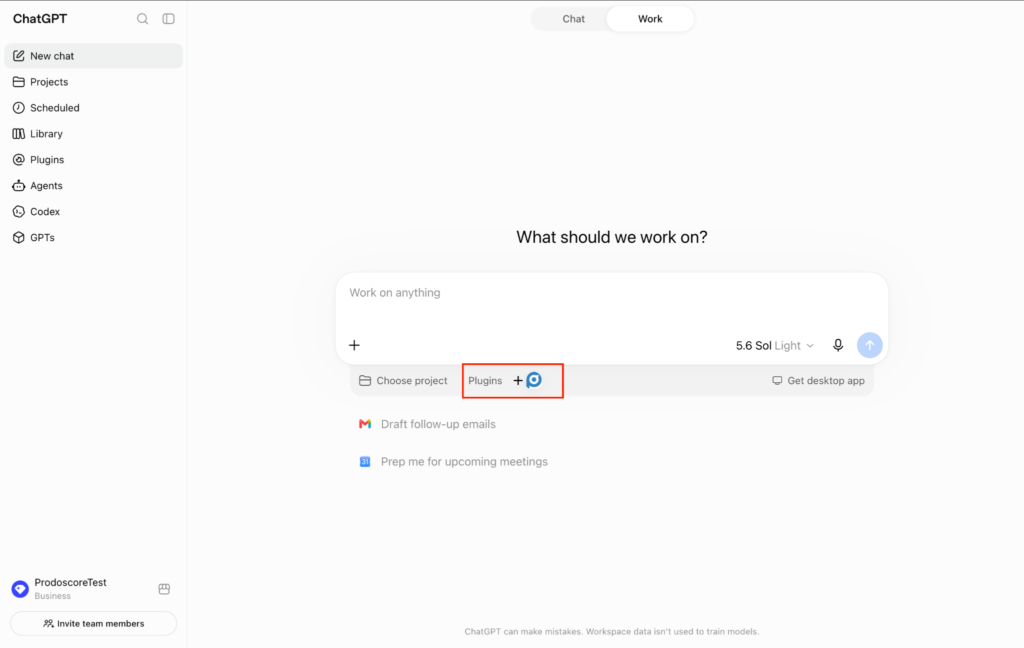
- You can now click the plugin to start interacting with it!
Other AI Chat Systems
Using Prodoscore's Client Credential Management, administrators can generate and manage the client credentials required to configure secure MCP connections.
For instance, to connect with https://abc.ai, the user requires the callback URL of the respective chat system, which is typically available within its developer documentation. Upon obtaining this URL, such as https://abc.ai/v1/connections/oauth-callback, the user must copy it and follow the subsequent instructions.
To register a new chat client and generate credentials, follow these steps:
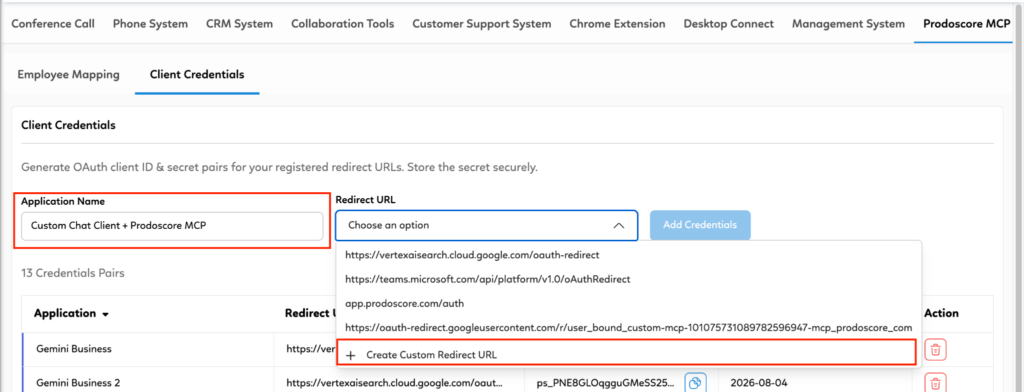
- Navigate to Settings: Log in to the Prodoscore application and go to Settings.
- Access Products: Select Products and then click on Prodoscore MCP.
- Register Client: In the UI, provide a descriptive name for the chat client.
- Configure Redirect: Identify the callback URL of your specific chat client and enter it as the Allowed Redirect URL.
- Important: Major federated clients, such as Gemini Enterprise and Copilot Chat, are already pre-configured within the user interface. You may select the appropriate client from the provided dropdown menu.
- Retrieve Credentials: Upon submission, Prodoscore will provision a unique Client ID and Client Secret pair specifically for that chat client.
Once these steps are completed, the MCP integration is available for immediate use.